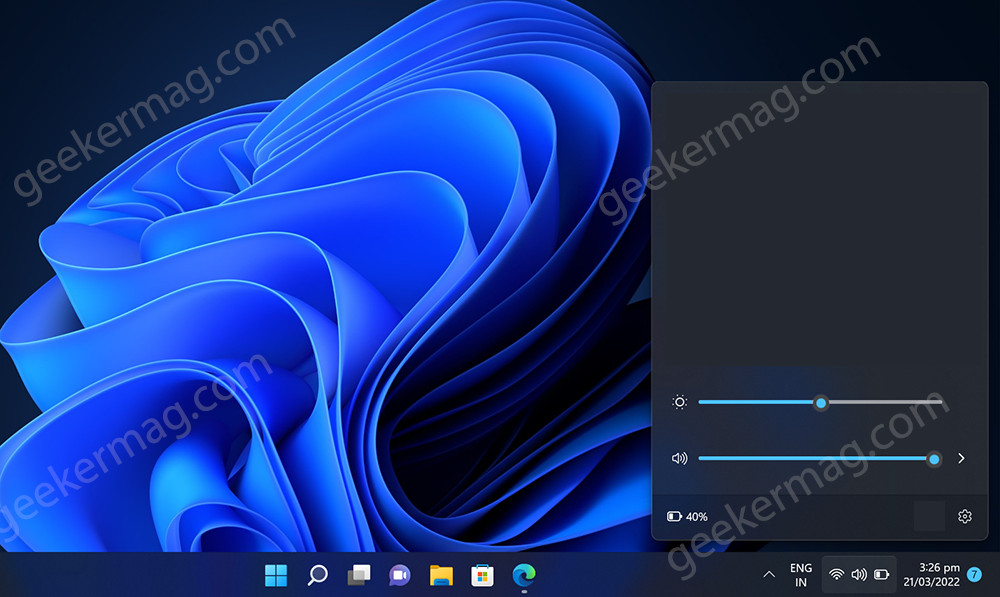
To launch Quick Settings panel in Windows 11 users can either click on the (Wi-fi + Volume + Battery) button on the right side of the taskbar or use WIN + A key combo. Quick Setting panel is a nifty addition in Windows 11 that allow users to access various settings right from the taskbar. Unfortunately, some users reporting that Quick Settings panel is not opening whenever they are trying to launch it using one of the method discussed above. Another group of users reporting that, Quick Settings panel opening but there’s no option available in it.
How to Fix “Quick Settings Panel Not Opening in Windows 11”
If you made upto this blog post, then its highly possible that you’re facing Quick Settings panel not opening in Windows 11 issue. To help you out we decided to cover possible solutions that will help in troubleshooting and fixing the same issue. So let’s start with first method:
Quick Reboot
Before doing anything else, we suggest users to perform a quick reboot as this will fix the issue.
Update Windows 11 PC
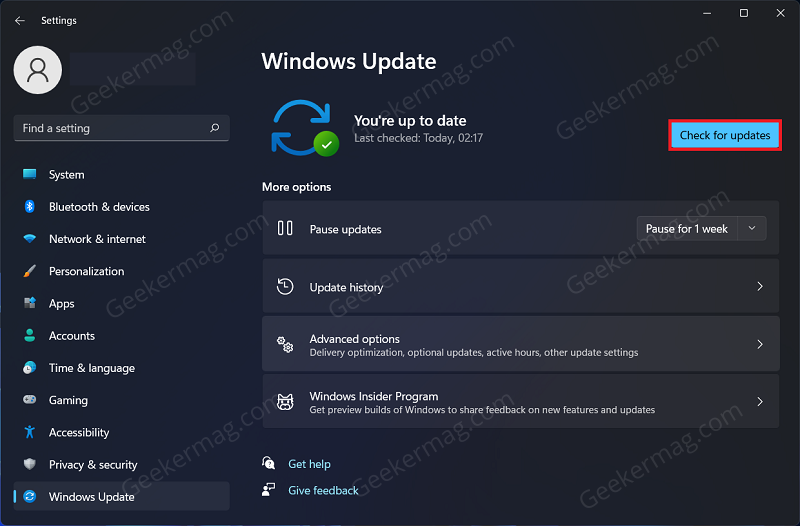
From the day, Microsoft has rolled out Windows 11, they’re regularly releasing bug fixes after listening to feedbacks shared by users. So we recommend users to head over to Settings (WIN + I) > Windows Update > Check for updates. If any update is available, then install it and check if this fixes the issue.
Restart File Explorer
After upgrading to Windows 11 lots of users who’re facing issues related to Taskbar reported that they manage to fix he issue just by restarting the file explorer in Windows 11.
Run SFC Or DISM to Repair Windows 11 Issue
It is highly possible that some of the system files are corrupted on your Windows 11 PC and as a result Quick settings panel behaving abnormally. Fortunately, Windows 11 comes with nifty tool named as System File Check and DISM Scan to fix the issue. Check out following blog post for instructions:
Use System File Checker (SFC) to Repair System Files in Windows 11 How to Repair Windows 11 using DISM from Command Prompt
First of all, you need to perform SFC Scan, if it fails to fix the issue, then try DISM scan. If both methods fails to fix the issue, then head over to next solution.
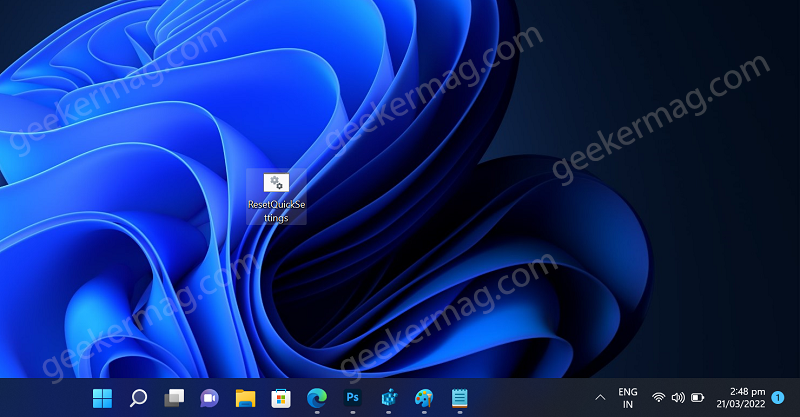
Reset Quick Settings (Recommended)
You can reset Quick Settings to factory settings in Windows 11 if its not opening, edit button is missing or facing other issue in Windows 11. Majority of users suggested that they manage to fix Quick Settings panel not opening in Windows 11 by doing this.
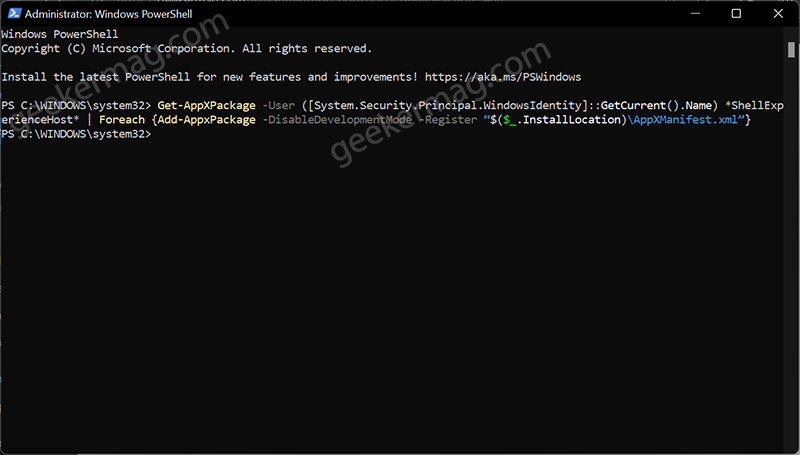
Use Powershell Command (Recommended)
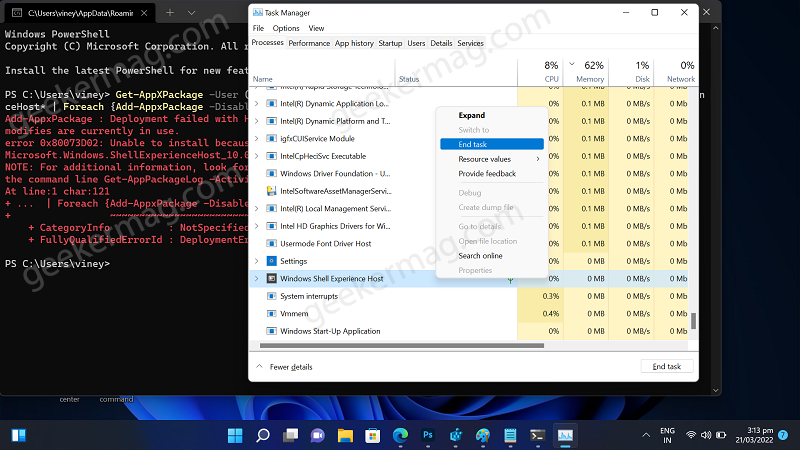
Open the Start Menu on your PC by pressing the Windows key. In the Start Menu, search for Windows PowerShell. Select Windows PowerShell and then click on Run as Administrator. In the Windows PowerShell, type and execute the following commands: Once done, close the Windows PowerShell and restart your PC. In case, you’re seeing a error message or command is not executed successfully, then you need to launch Task Manager by using CTRL + SHIFT + ESC Here, locate Windows Shell Experience Host, right-click and select End Task. After that, execute the above command This should fix the issue, and you should now be able to open the Quick Settings Panel on Windows 11.
Windows 11 Last Resort to fix issue
If none of the above steps helped you fix the issue, then you should try following hardcore solution to fix the issue which includes:
Reset Windows 11 without deleting dataRepair Install Windows 11 using ISO image
Following the troubleshooting steps in this article, you will be able to fix the Quick Settings Panel not opening in Windows 11. In case, you know any other solution that help in fixing the issue, but we missed to cover in this blog post, then please share with us in the comments