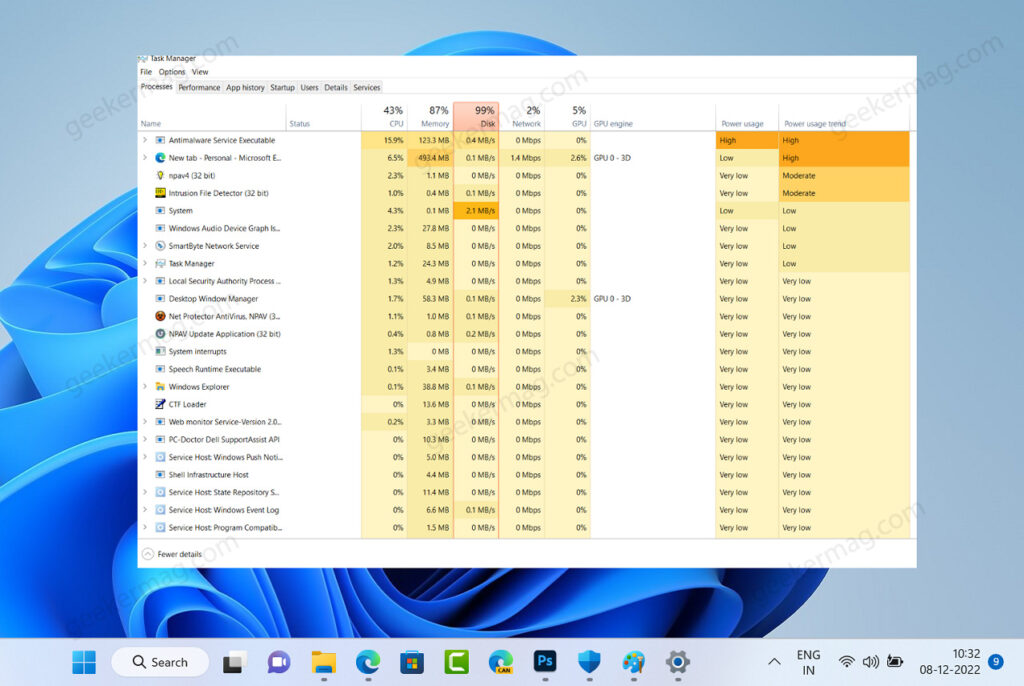
Before reading about solutions to fix the Antimalware Service Executable High Memory Usage issue, let’s learn a little about what it is and the possible reasons why it eating up lots of memory on your device. Antimalware Service Executable is a Windows Service that runs in the background to protect your PC from malware. The service run in the background and usually doesn’t use high memory usage unless you are performing a system scan, or updating the virus definitions. Antimalware Service Executable service uses a Memory for a limited period especially when you’re performing a scan, and later back to normal, then it’s usual and there’s nothing to worry about. In case, the same service uses high memory even when it’s not in use, then there’s an issue.
Fix – Antimalware Service Executable High Disk, Memory & CPU issue Windows 11
The good thing is there are possible solutions that we’re going to cover in this blog post that you can use to fix Antimalware Service Executable using High Memory, CPU, and RAM. Let’s start with the first one on the list:
System is Up-to-date
If you’re running an outdated build of Windows 11 on your PC, then it’s highly possible to face such an issue. So before doing anything discussed in this blog post, update your PC to the latest build/version. Here’s how you can do that: Launch the Settings app by pressing WIN + I key combination. Switch to the Windows Update tab on the left, and then on the right side, check if the latest update is available or not. You can click on the “Check for updates” button. Once the latest update is available, install it and check if this fixes the issue.
Disable Real-Time Protection
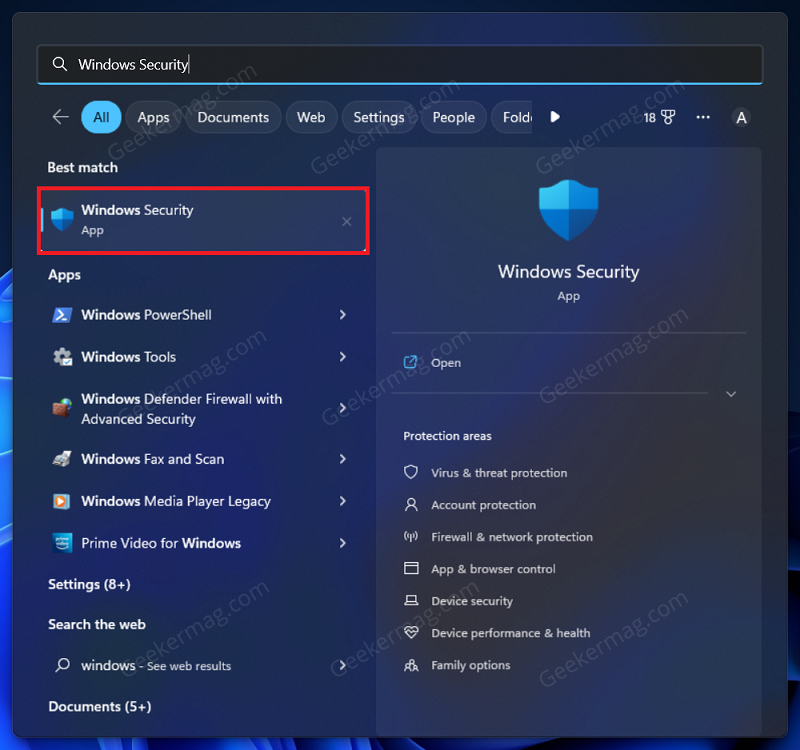
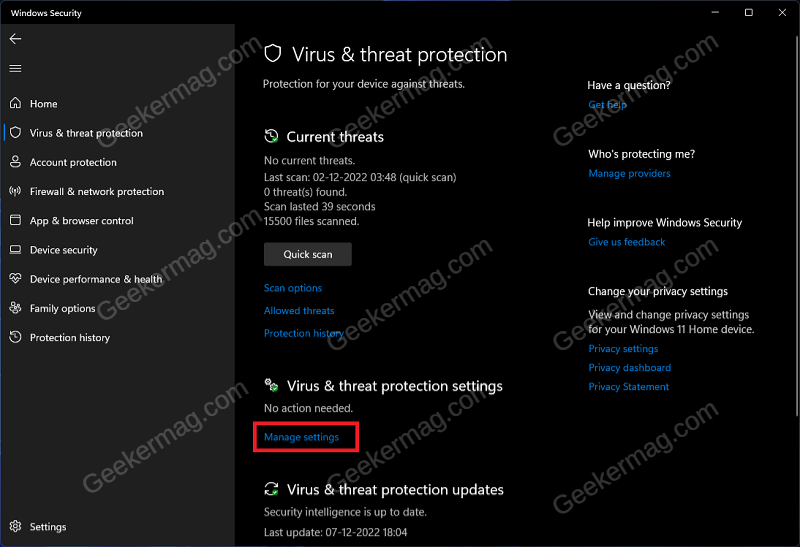
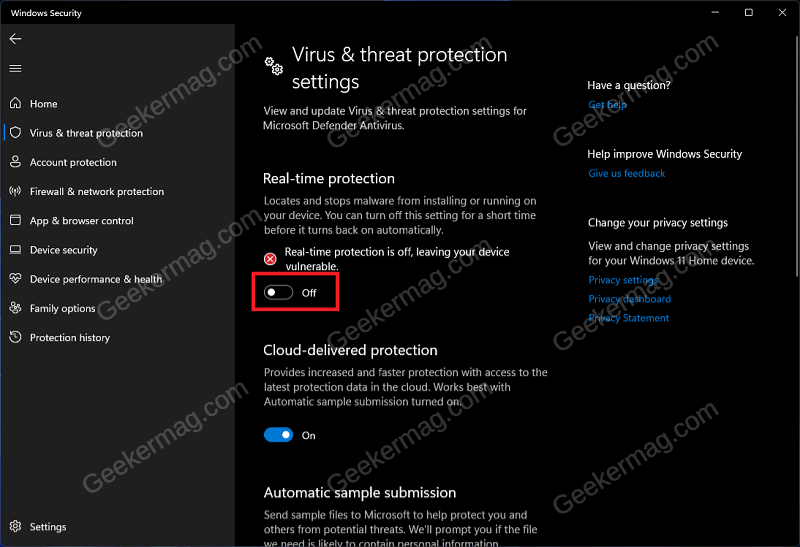
If you have been facing Antimalware Service Executable high memory usage then try disabling the real-time protection. Real-time protection automatically scans for malware in the background and stops them from running on your PC. Press the Windows key on your keyboard, and then in the Start Menu, search for Windows Security and open it. In the Windows Security window, click on Virus & threat protection option. Under the Virus & threat protection settings section, click on Manage Settings. Here, turn off the toggle for Real-Time Protection. Note- Real-Time protection will get turned on automatically when you restart your PC or sign into it again.
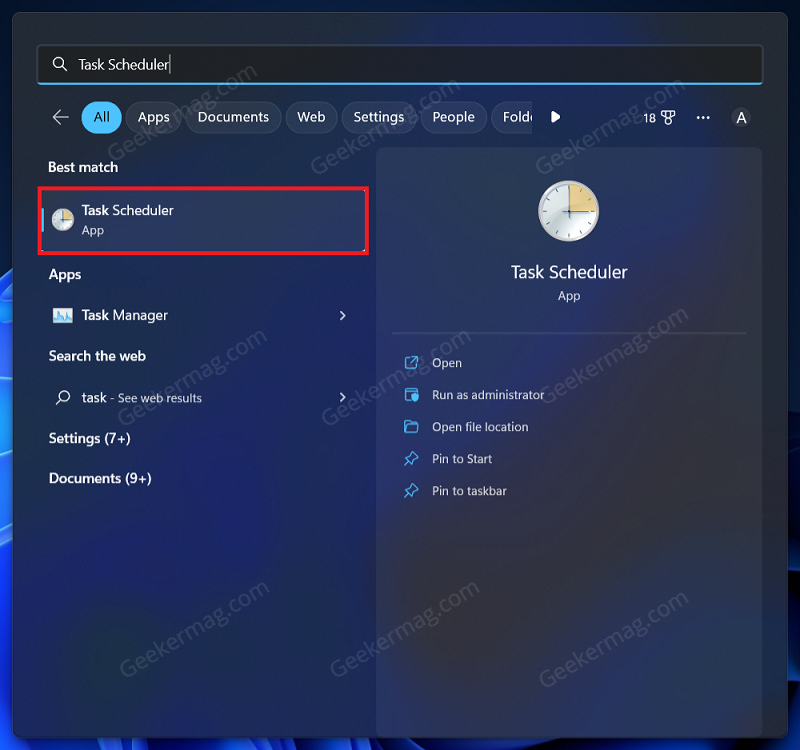
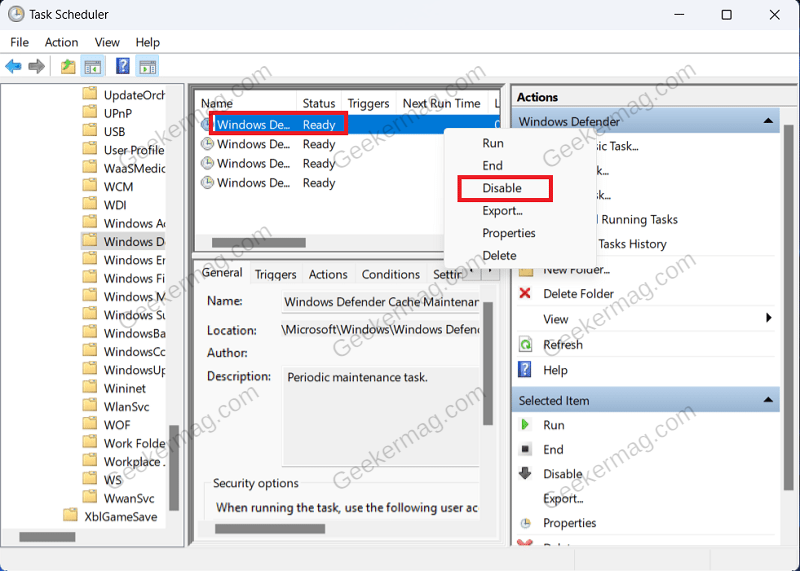
Disable Scheduled Tasks For Windows Defender
There are certain scheduled tasks for the Windows Defender that will automatically run in the background. If you have been facing high memory usage due to the antimalware service executable, then you can disable these scheduled tasks. To do so, follow the steps given below- Click on the Start Icon on the taskbar, search for Task Scheduler and click on the very first option that appears. In the Task Scheduler, navigate to the following address on the left sidebar: Task Scheduler Library > Microsoft > Windows > Windows Defender You will some scheduled tasks on the right side. Right-click on the first task, and then click on Disable to disable it. Similarly, disable all the scheduled tasks for the Windows Defender you see on the right side.
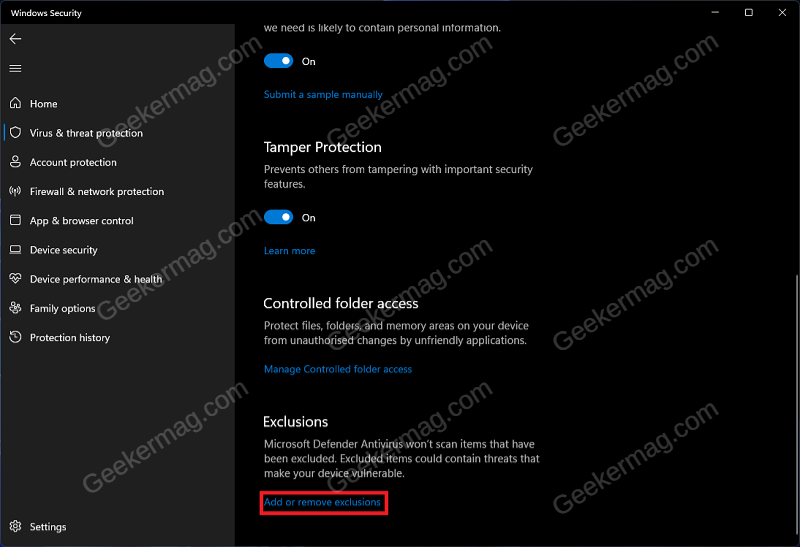
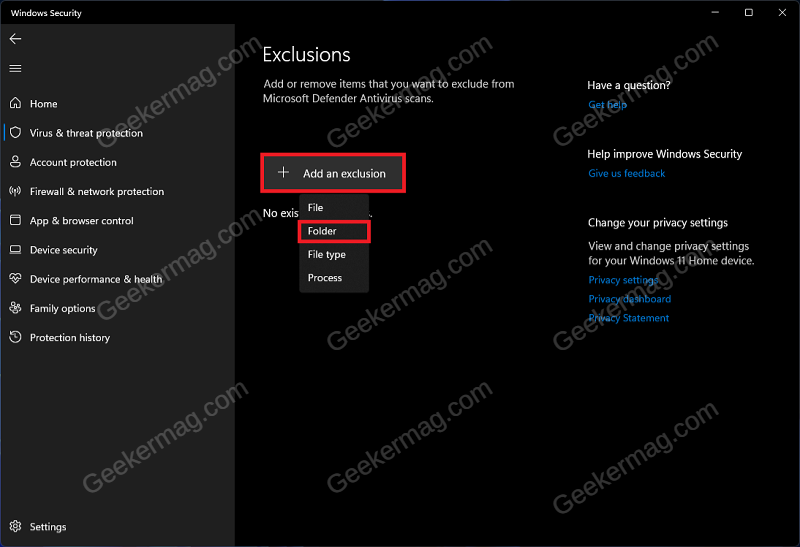
Exclude Windows Defender Folder From Antivirus Scan
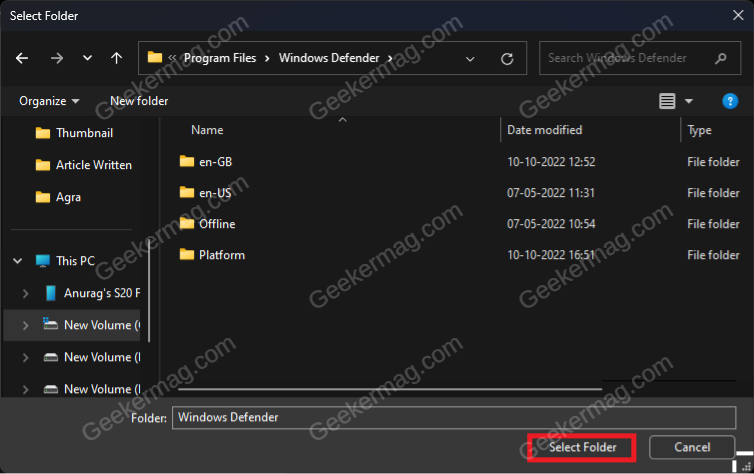
Another troubleshooting step to follow is excluding the Windows Defender Folder from the Antivirus scan. You can do so by following the steps given below- Open Start Menu and search for Windows Security. Now, click on Windows Security from the search result to open it. In the Windows Security window, click on Virus & Threat Protection. Now, click on the Manage Settings option under Virus & threat protection settings. Under the Exclusions section, click on Add or remove exclusions. Now, click on Add an exclusion and then on Folder. Now in the File Explorer window that opens up, head to the following address: C:\Program Files\Windows Defender Click on the Select Folder button to select the Windows Defender folder. Once done, restart your PC and see if you are still facing the issue.
Install Third-Party Antivirus
Install third-party antivirus on your PC if you are facing Antimalware Service Executable high memory usage. When you install a third-party antivirus, then Windows Defender (or Windows Security) will automatically get disabled and you should no longer face issues due to it.
Use Registry Editor To Disable Windows Defender AntiSpyware
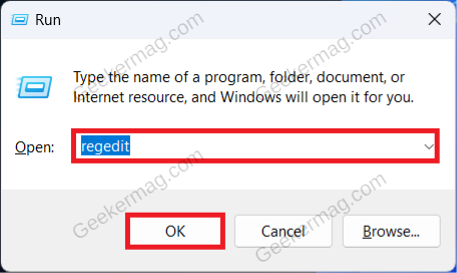
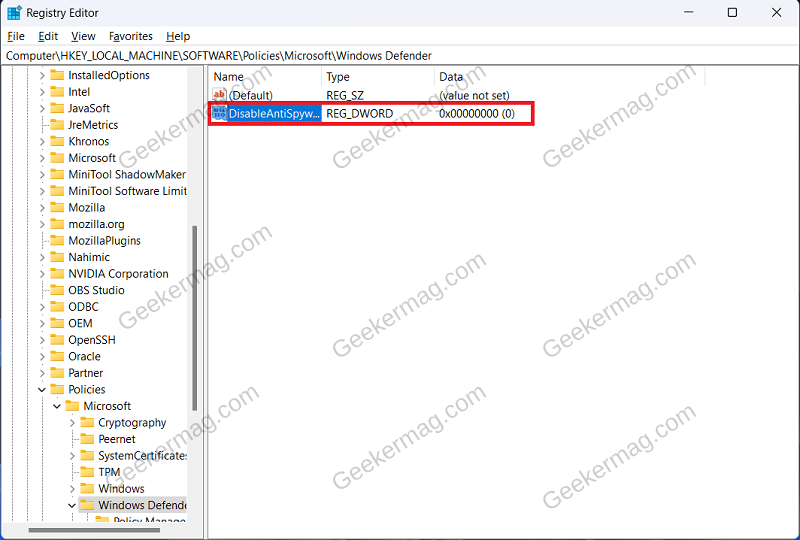
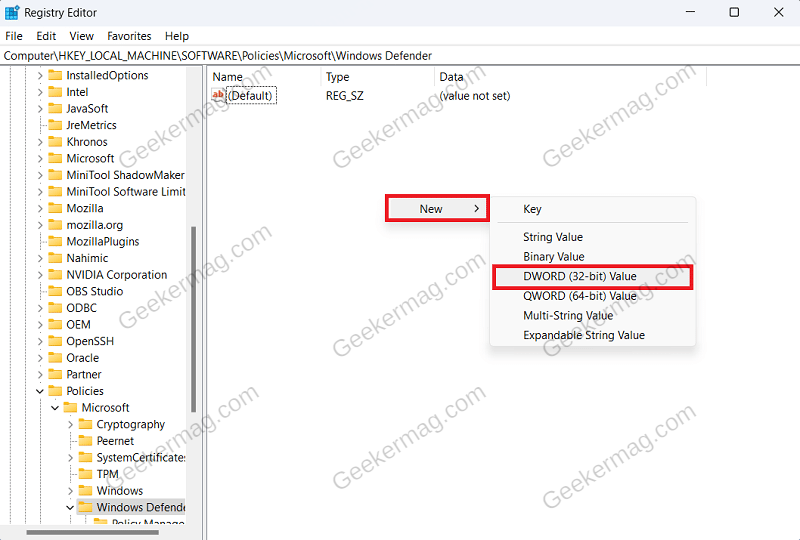
If installing the third-party antivirus didn’t help solve the issue, then disable the Windows Defender AntiSpyware. Continue with this method only if you have a third-party antivirus installed on your PC. You can use Registry Editor to disable Windows Defender AntiSpyware. Press Windows + R key combo to open Run Dialog Box. Here, type Regedit and click on OK to open Registry Editor. Navigate to the following address in Registry Editor: Computer\HKEY_LOCAL_MACHINE\SOFTWARE\Policies\Microsoft\Windows Defender On the right side, look for DisableAntiSpyware DWORD. If this DWORD is not available, then right-click on the empty space on the right side, click on New, and then on DWORD (32-bit) Value. Name the new DWORD DisableAntiSpyware. Double-click on this DWORD value to edit it. Set the Value Data to 1 and click on OK. Close the Registry Editor and restart your PC to save the changes. Why don’t you try these solutions and check if this helps in fixing the Antimalware Service Executable high memory usage issue in Windows 11? If you’re aware of another solution, share it in the comments.